
House Painting Tips for a Cleaner, Longer-Lasting Finish
House Painting Tips for a Cleaner, More Reliable Finish
The best house painting tips are mostly about what happens before the final coat. A clear scope, sound surfaces, suitable tools, careful protection and enough drying time make the painting itself much easier.
This guide brings those steps into a practical order for Melbourne homeowners tackling an interior or exterior repaint. For larger outdoor projects, see Exterior Painters Melbourne.
1. Plan the Painting Scope Before Buying Materials
List every surface first: walls, ceilings, doors, trims, cabinets, fences and exterior areas. A room that only needs wall paint is a different job from one that also needs ceiling repairs, door enamel and timber trim preparation.
Note occupied rooms, furniture movement, pets, access limits and the date the area needs to be usable again. A simple room-by-room list reduces missed surfaces and last-minute product changes. For a broader service overview, see house painting services.
Ask one useful question before buying paint: what needs to look better, and what also needs repair or protection? That answer affects preparation, products, tools and the realistic amount of time required.
2. Inspect the Surface Before Choosing Paint
Fresh paint does not repair an unstable surface. Check walls and trims for cracks, dents, loose coating, stains, failed caulk, grease, chalking and moisture marks. Run a hand across the surface and use side light to spot bumps or shallow defects that normal room lighting can hide.
Do not paint over an active leak or damp area. Resolve the source first and let the surface dry. Minor damage may suit wall repair services, while larger holes, damaged joints or plaster failure may need plaster repair before painting.
3. Clear, Clean and Protect the Work Area
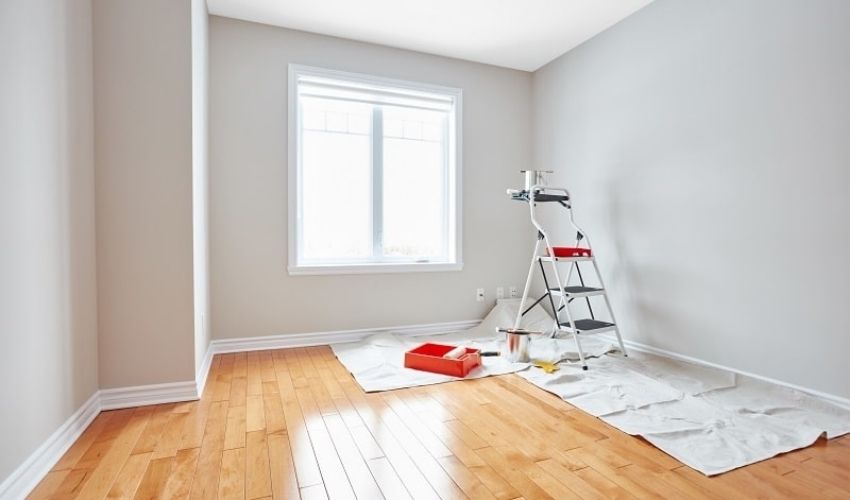
Painting is easier when the room is organised. Remove light furniture, pictures, hooks, curtains and fragile objects. Move larger pieces together and cover them properly. Protect floors, switches, fittings, benchtops and windows before opening paint.
For exterior work, also think about gardens, paving, neighbouring surfaces and nearby vehicles. Keep children and pets away from wet coatings, ladders and stored tools.
- Confirm that the room or exterior area is accessible before work starts.
- Remove loose dust, cobwebs, grease and surface contamination.
- Cover floors and furniture before opening paint or compound.
- Label removed doors, handles and fittings if they need to return to the same position.
- Provide ventilation without blowing dust directly onto wet paint.
- Keep cleaning materials ready for small spills.

4. Repair, Sand and Prime Where the Surface Needs It
Preparation should match the defect instead of becoming a generic checklist. Fill holes, repair cracks, smooth rough edges and remove loose coating. Sand enough to create a sound, even surface, then remove dust before priming or painting.
Primer is most useful where the substrate or coating system calls for it: bare material, repaired patches, stains, porous areas or difficult previous finishes. Follow the actual product instructions for compatibility, preparation, drying and recoat time.
5. Use Brushes That Give You Control
Cheap brushes can shed bristles or make clean edges harder to achieve. A better brush does not replace technique, but it can make the work more predictable. Choose the brush shape and size around the job rather than using the same brush for every surface.
For corners, ceiling lines, frames and trim, an angled brush can give better control. Load a modest amount of paint, remove excess before approaching the edge and keep your hand close enough to the ferrule to control the brush.
6. Use Masking Tape Carefully
Masking tape is useful for protecting finished surfaces and controlling splatter, but it should not replace careful cutting in. Test tape on delicate or recently painted surfaces first, press the edge down cleanly and remove it according to the tape and paint instructions rather than leaving it in place indefinitely.
The safest tape is the one that suits the surface underneath. Strong adhesion can damage weak or fresh coatings when the tape is removed.
7. Learn to Cut In Before Rolling the Main Area
Cutting in means painting the controlled edges where the wall meets ceilings, trims, corners or another colour. Work at a comfortable height, use a stable platform where needed and avoid stretching too far.
Do not overload the brush. Start slightly away from the final edge to release excess paint, then guide the remaining paint into the line. Work in sections so the cut-in area and rolled wall can blend while the coating is still workable.
8. Test Colour and Sheen on the Real Surface
A small colour chip cannot show exactly how paint will look across a full room. Test shortlisted colours on the actual surface or on a movable sample board, then view them in morning, afternoon and evening light.
Check the samples beside flooring, tiles, timber, curtains and joinery. Sheen matters too because it changes reflection and can make surface texture more visible. Use the house painting colour ideas guide before finalising the palette.

9. Match the Roller, Brush and Coating to the Surface
Walls, ceilings, doors, trims, masonry, weatherboards and metal do not need the same tool or coating. Roller nap should suit the surface texture and product, while brushes should give enough control for edges and detailed work.
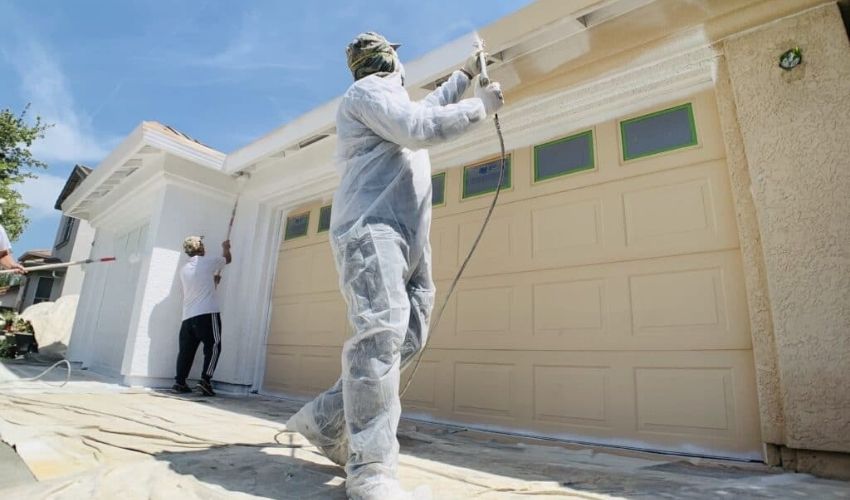
A telescopic extension pole can make ceilings and higher wall sections easier to reach without repeatedly moving a ladder. Spraying can suit broad or detailed work when masking and technique are controlled. Compare the methods in spray versus brush and roller. Cabinets need another preparation and coating approach, covered by cabinet painting services.

10. Use a Consistent Painting Order
A repeatable order reduces accidental marks and unnecessary rework. Many interior projects begin with the ceiling, followed by walls, trims and doors, but the right order still depends on the scope and what has been removed or protected.
Work in manageable sections. Cut in without getting too far ahead of the roller, maintain a wet edge and use consistent pressure. Once the paint begins to set, leave it alone rather than repeatedly brushing or rolling the same area.
- Mix and prepare: stir the coating as directed and organise tools before starting.
- Cut controlled edges: paint corners, ceiling lines and trim boundaries carefully.
- Roll the main area: work in sections and maintain a consistent wet edge.
- Leave the coat alone: let it level and dry instead of repeatedly touching it.
- Inspect before recoating: check coverage and follow the label before applying the next coat.
11. Respect Drying, Recoat and Weather Conditions
Dry-to-touch time, recoat time and full cure are different stages. Follow the instructions for the exact paint product and current conditions instead of relying on one fixed timetable for every job.
Interior ventilation should help drying without pushing dust onto wet paint. Exterior work also needs suitable weather: rain, dew, heat, wind and direct sun can all affect application. See exterior painting services for broader exterior project planning.
12. Clean Tools Before Paint Dries on Them
End-of-day clean-up is part of the job. Follow the coating manufacturer’s instructions for cleaning brushes, rollers and equipment. Do not pour paint, solvent or contaminated wash water into stormwater drains.
If tools are being reused during the project, store them in a way that prevents the coating from drying without creating spills or contamination. Close paint containers properly and keep lids, trays and work areas clean.
13. Use a Stable Ladder or Platform
Do not stretch sideways from a ladder to save a few minutes. Reposition it so the work stays within comfortable reach, and use an extension pole where it makes sense. Keep the floor around the ladder clear of drop sheets, cords and open paint tins that can create a trip hazard.
Painting Mistakes That Create Extra Work
- Painting before dust, grease or loose material has been removed.
- Using thick coats to compensate for poor preparation or poor coverage.
- Skipping repairs because the new colour is expected to hide them.
- Using the wrong roller nap or brush for the surface and coating.
- Letting cut-in areas dry too far ahead of the rolled wall.
- Recoating before the product is ready.
- Judging wet paint as the final colour.
- Rushing clean-up and allowing tools or lids to dry with paint on them.
House Painting Tips FAQs
What is the most important house painting tip?
Start with the surface condition. Clean, repair, sand and prime where required before applying finish coats. Good topcoat technique cannot fully compensate for an unstable or dirty base.
Should I wash walls before painting?
Clean walls when dust, grease, residue or other contamination is present. Use a cleaning method suitable for the wall and coating, then allow the surface to dry before painting.
Do all walls need primer?
No. Primer is commonly needed on bare, repaired, stained, porous or difficult surfaces, but the actual requirement depends on the substrate and selected coating system.
How many coats of paint does a house need?
There is no universal number. Coverage depends on the substrate, colour change, paint product and application. Follow the coat system specified for the selected paint.
Should I paint the ceiling or walls first?
Many interior projects start with ceilings, followed by walls, trims and doors. The practical order can change with the project scope, access and which surfaces have been removed or masked.
Need a Painting Plan That Fits Your Property?
Share photos, affected surfaces, repair concerns, colour choices and preferred timing with VicPainter so the preparation and painting scope can be reviewed together.
