How to paint an old weathered fence?
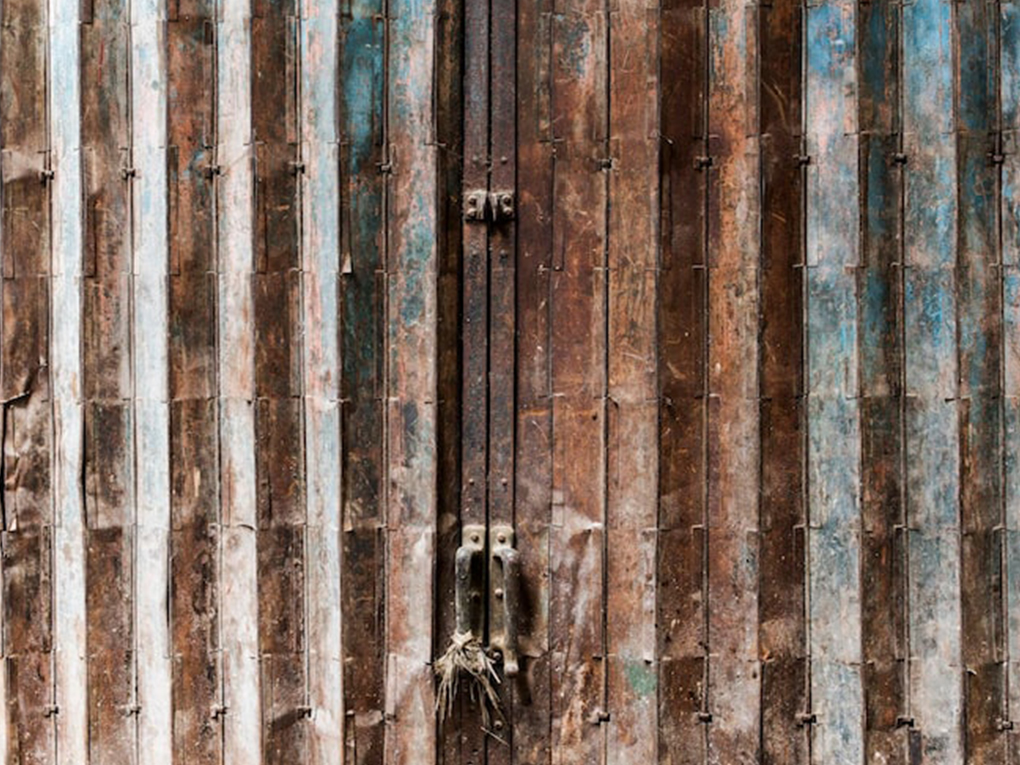
Your property’s perimeter is the first thing people see, but over time, exposure to harsh sunlight, heavy rain, and fluctuating temperatures takes a massive toll on timber. An old, graying, and peeling fence can drag down your entire home’s curb appeal. Fortunately, replacing the timber is not your only option. Learning how to paint an old weathered fence can save you thousands of dollars while completely transforming your outdoor space.
Why Restoring Your Old Fence is Worth the Effort
You might wonder if painting old wood is truly worth the time and energy. The short answer is yes. Beyond the obvious cosmetic improvements, painting or staining your fence provides a crucial layer of protection.
First, paint seals the timber, preventing moisture from penetrating the surface and causing rot. Second, a high-quality exterior paint blocks harmful UV rays that dry out and splinter the wood.
Finally, maintaining your boundary structures significantly boosts your property value. A well-maintained perimeter signals to guests and potential buyers that the entire property is cared for.
Essential Tools and Materials You Will Need
Before you dive into the project, gathering the right supplies will make the process infinitely smoother. Here is a quick checklist of what you should have on hand:
- Cleaning supplies: A pressure washer or a stiff bristle brush and exterior wood cleaner.
- Prep tools: A paint scraper, medium-grit sandpaper, and an orbital sander for large flat areas.
- Repair materials: Exterior-grade wood filler and a putty knife.
- Protection: Drop cloths, painter’s tape, safety goggles, and a dust mask.
- Application tools: Quality paint brushes, a medium-nap roller, or an airless paint sprayer.
- Paint: A high-quality exterior acrylic latex paint and an oil-based or stain-blocking primer.

The Crucial First Step
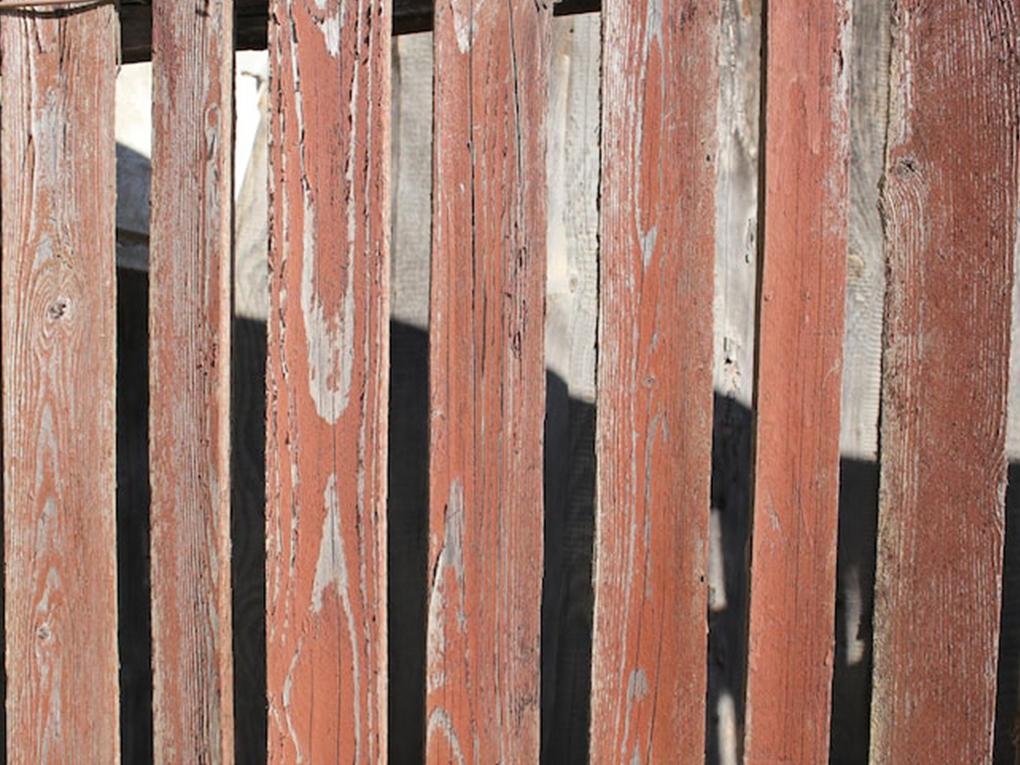
The biggest mistake homeowners make when tackling a weathered fence is rushing straight to the painting phase. If you apply premium paint over dirt, mold, or peeling flakes, the new coat will bubble and peel within months.
Start by thoroughly washing the timber. A pressure washer is highly effective, but you must keep the nozzle moving to avoid gouging the soft, aged wood. Once the fence is completely dry, scrape away any loose, flaking paint.
Next, sand down the rough edges to create a smooth surface for the new coat to grip. You must also fill any deep cracks or holes with exterior wood filler.
Knowing exactly how to prep a fence before painting is the absolute most important factor in ensuring your restoration lasts for years against the elements. After sanding, wipe the boards down with a damp cloth to remove all lingering dust.
Choosing the Best Application Method for Your Project
Once your timber is clean, repaired, and primed, you need to decide how to apply the topcoat. The right method depends entirely on the size of your yard, your budget, and your comfort level with different tools.
The Classic Approach: Roller Application
Using a roller strikes a great balance between speed and control. It is significantly faster than using a brush alone and allows you to push the paint deeply into the porous, weathered grain of the wood.
If you have a medium-sized yard and want to avoid the messy overspray that coats nearby plants, mastering how to paint a fence with a roller is an excellent path forward.
You will still need a high-quality angled brush to cut in around the posts and reach the tight gaps between the palings, but the roller will handle the bulk of the surface area efficiently.
Speed and Efficiency: Sprayer Application
If you have a massive perimeter to cover, using a brush or roller might take several weekends of backbreaking labor. An airless sprayer is the ultimate tool for rapid coverage.
It atomizes the paint, delivering a perfectly smooth, factory-like finish without any brush marks. Understanding how to paint a fence with a sprayer will dramatically reduce your project time.
However, this method requires meticulous masking. You must cover nearby vegetation, concrete paths, and even your neighbor’s property with drop cloths to protect them from airborne paint particles.
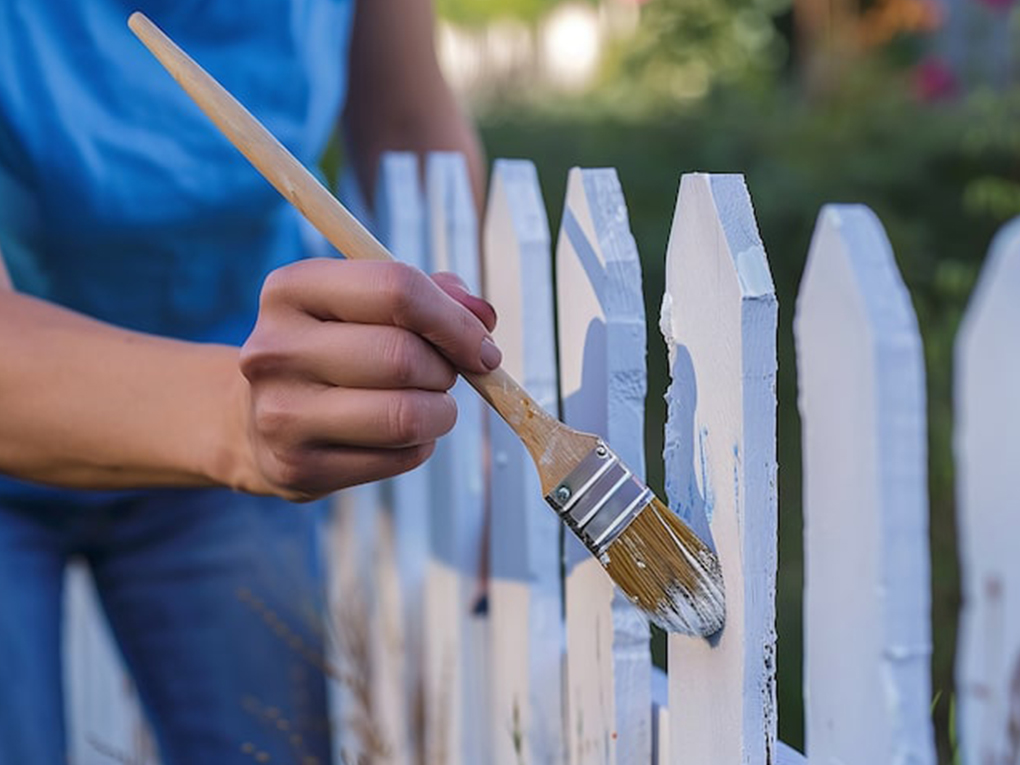
Executing the Perfect Paint Job
With your method chosen and tools ready, it is time to transform the wood. Always start by applying a high-quality, stain-blocking primer.
Weathered timber is incredibly dry and porous; it will soak up the first liquid it touches. A primer seals the wood, ensuring your expensive topcoat goes further and looks richer.
Once the primer is dry, apply your exterior paint. Work systematically, completing one section at a time. Follow the grain of the wood to ensure seamless coverage.
If you want a thorough breakdown of the workflow, utilizing a structured guide on how to paint a fence step by step will help you maintain consistency and avoid common mistakes.
Always apply two coats for maximum durability and weather resistance, allowing adequate drying time between each layer.
Professional Services vs. DIY Restoration
While restoring an old fence is a rewarding DIY project, it is also incredibly labor-intensive. Assessing the condition of your timber honestly is important.
If the wood requires extensive repairs, if your property spans a massive area, or if you simply do not have the time to dedicate to the rigorous prep work, calling in the experts is often the smartest choice.
Professional painters possess the commercial-grade equipment and expertise needed to handle severe weathering. When you invest in expert fence painting, you are guaranteeing a flawless, durable finish that protects your property value without the physical strain and weekend sacrifices of a DIY endeavor.
Frequently Asked Questions (FAQs)
Do I really need to use primer on an old fence?
Yes, absolutely. Weathered wood is highly porous. A good primer seals the surface, stops tannins from bleeding through and discoloring your topcoat, and provides a necessary surface for the new paint to bond with.
Can I just paint over peeling paint?
No. Painting over peeling flakes guarantees that your new coat will also peel off almost immediately. You must scrape and sand away all loose material until you reach a stable surface.
What is the best type of paint for an old wooden fence?
A premium exterior 100% acrylic latex paint is generally the best choice. It is durable, color-fast, and flexible enough to expand and contract with the wood as the temperature changes.
How long should I wait for a washed fence to dry before painting?
If you have power-washed the timber, you must wait at least 24 to 48 hours in warm, dry weather. Painting over damp wood traps moisture, which leads to blistering and rot.
How long will a newly painted fence last?
With proper preparation and high-quality exterior paint, a painted wooden fence can easily last 5 to 9 years before needing a major touch-up, depending on your local climate conditions.
Learning how to paint an old weathered fence is one of the most impactful ways to revitalize your home’s exterior. While the process demands patience and thorough preparation, the results speak for themselves.
By carefully cleaning the wood, selecting the right primer, and utilizing the best application methods, you can turn a dilapidated boundary into a stunning neighborhood standout.
Are you ready to bring your weathered timber back to life but lack the time to tackle the project yourself? Do not let a fading perimeter drag down your home’s curb appeal.
Contact the professional team at VicPainter today for a consultation, and let the experts deliver a flawless, weather-resistant finish that will look incredible for years to come!
- Address: 71 Rochester Road, Balwyn, VIC 3103
- Hotline: 0401 851 598
- Email: pm@vcolour.com.au
- Website: www.vicpainter.com
- Facebook: facebook.com/fencepaintingmelbourne/
- Instagram: instagram.com/wallrepair.melbourne/